• Home
  • Discover
    • About Us
    • Careers
    • Success Stories
    • Blog
  • What we do
    • Product Engineering
      • Discover & Frame Workshop
      • Full Cycle Product Development
      • Design & Product Consultancy
      • App Development
      • Cloud & DevOps
      • Data & Analytics
      • Software testing
      • Internet of Things
      • AI & Machine Learning
    • Enterprise Services
      • Technology Consulting
      • Legacy Modernisation
      • Enterprise Mobility
      • ERP Services
    • Smart Teams
      • Dedicated Teams
      • Offshore Development Centre
  • Who we serve
    • Ecommerce & Retail
    • Education
    • Supply Chain
    • Financial Services
    • Consumer Internet
    • Healthcare & Pharma
    • Loyalty & Rewards
    • Real Estate
    • Travel & Hospitality
    • Independent Software Vendors (ISVs)
  • COES
    • Mobility COE
    • Design COE
    • Data Science COE
  • Contact Us
Dew Solutions
  • Home
  • Discover
        • Dew Solutions specialises in a suite of Application Development that is mission critical for business and enterprise, for clients across the world.

          We are expanding rapidly and are working on several cutting technologies across various domains. We have some of the best in the industry working with us and are looking for young and bright minds to join us.

          Learn More

        •   Discover
          • About Us
          • Careers
          • Success Stories
          • Blog
  • What we do
        •   Product Engineering
          • Discover & Frame Workshop
          • Full Cycle Product Development
          • Design & Product Consultancy
          • App Development
          • Cloud & DevOps
          • Data & Analytics
          • Software Testing
          • Internet of Things
          • AI & Machine Learning
        •   ENTERPRISE SERVICES
          • Technology Consulting
          • Legacy Modernisation
          • Enterprise Mobility
          • ERP Services
        •   SMART TEAMS
          • Dedicated Teams
          • Offshore Development Centre
  • Who we serve
        • We are a team of specialists with experience in a gamut of technologies and domains.

          We possess a deep understanding of different languages and tools in the areas of design, development, and testing. Certified and experienced, our team combines technical know-how with industry best practices to create sustainable solutions.

          We deliver bespoke industry specific solutions leveraging our extensive digital experience, design-led engineering approach and agile processes backed by our strong expertise in cutting edge technologies

          Learn More

        •   WHO WE SERVE
          • Ecommerce & Retail
          • Education
          • Supply Chain
          • Financial Services
          • Consumer Internet
          • Healthcare & Pharma
          • Loyalty & Rewards
          • Real Estate
          • Travel & Hospitality
          • Independent Software Vendors (ISVs)
  • COE
        • To nurture the technical prowess of these solution providers and strengthen our offerings further – Dew Solutions has institutionalised various Centres of Excellence (CoEs).

          These Centres of Excellence drive the experience and excellence which we want to deliver to our customers. Our subject matter experts in these CoEs collaborate with our customers to co-create and co-innovate thereby empowering them with ‘real’ solutions which their business needs.

          Learn More

        •   COE
          • Mobility COE
          • Design COE
          • Data Science COE
Contact Us
Menu
Dew Solutions
  • Home
  • Discover
    • About Us
    • Careers
    • Success Stories
    • Blog
  • What we do
    • Product Engineering
      • Discover & Frame Workshop
      • Full Cycle Product Development
      • Design & Product Consultancy
      • App Development
      • Cloud & DevOps
      • Data & Analytics
      • Software testing
      • Internet of Things
      • AI & Machine Learning
    • Enterprise Services
      • Technology Consulting
      • Legacy Modernisation
      • Enterprise Mobility
      • ERP Services
    • Smart Teams
      • Dedicated Teams
      • Offshore Development Centre
  • Who we serve
    • Ecommerce & Retail
    • Education
    • Supply Chain
    • Financial Services
    • Consumer Internet
    • Healthcare & Pharma
    • Loyalty & Rewards
    • Real Estate
    • Travel & Hospitality
    • Independent Software Vendors (ISVs)
  • COES
    • Mobility COE
    • Design COE
    • Data Science COE
  • Contact Us
Contact Us
Home»Blog  »  How To Guides   »   How to submit an Android app to Google Play Store?
  • Data Science
  • Development
  • Devops
  • How To Guides
  • Mobility
  • News
  • Technology
  • Testing
  • UX & Design

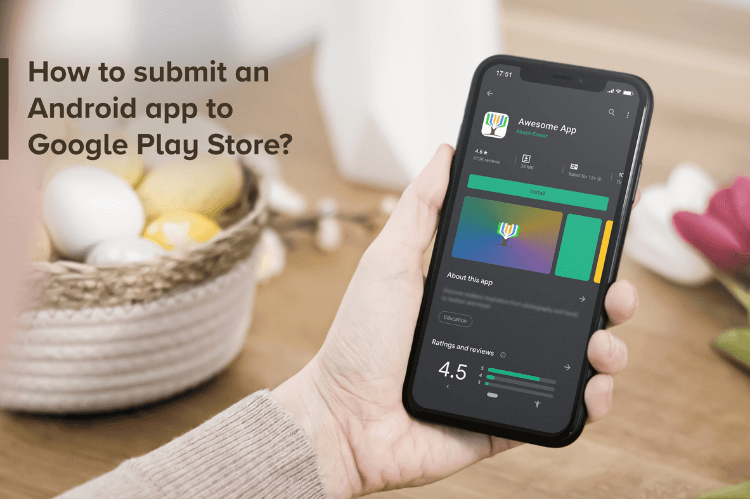
How to submit an Android app to Google Play Store?

By Editorial Team
June 1, 2021. 6 min read
Last update on: June 2, 2021
[Sassy_Social_Share]

Google Play Store is the largest app store in the world. As of December 2020, there are over 2.9 million apps on the platform, reports Statista, and on average, 3500 apps are added daily on the leading app marketplace.

For novices, submitting an app on the Google Play Store can be a bit intimidating. Like any other app store, it comes with its own set of guidelines and procedures. One must understand and adhere to their guidelines to avoid any troubles or face app rejection.

In this article, we have put forward a step-by-step guide on how to upload your Android app to the Google Play Store. Before we proceed, make sure you have thoroughly tested your app and it matches the Google Play Store guidelines so that you do not have come across any challenges during the upload process.

Related: How to Submit and Publish your iOS app to the Apple Store?

1. Create a Developer Account

Before you push an app to the Google Play Store, you need to have a developer account on Google Play Console. You can create an account using your existing Google account. The registration process is pretty straightforward where you will be asked to provide your name, secondary email address, and contact number. Enter your details, checkmark the agreement and terms of service, and submit. You will need to pay a one-off registration fee of $25 to set up a developer account. Once the payment has been made, it will take nearly 48 hours for your account to get approved.

2. Link Developer Account with Google Wallet Merchant Account

If the app is paid one or supports in-app purchases, you will have to create a merchant account. In order to create one,

  1. Sign in to your Google Console account
  2. Click on “Reports”, followed by “Financial Reports”
  3. Click on “Set up a merchant account now”
  4. Fill out your business information

Doing so will automatically link the merchant account to your Google Console account. A merchant account lets you manage and assess your app sales, monthly payouts, and track sales reports.

3. Create App

Now that all the setup is done, you are ready to publish your app to the Play Store. Log in to your developer account and follow the below-mentioned steps:

  1. Navigate to “All applications” in the menu on the left-hand side.
  2. On the top right, you will see the option “Create Application”, click on it.
  3. Choose your app’s default language from the dropdown menu.
  4. Enter the title of your application
  5. Click on “Create”

Don’t be hesitant while providing your app name as it can be changed later. Once the app has been created, you will be taken to the story entry page where you will have to provide entire details for your app store’s listing.

4. App Store Listing

Proceeding further on our guide to publishing your Android app on the Google Play Store is preparing the app store listing. Here, you will have to cautiously fill out the app details as these will be displayed to the app store users, however, this doesn’t need to be filled right away. You can skip the step for now if you want, save it as a draft and fill it in later. Nevertheless, the information that you need to provide is-

Product Details

Here, you will have to specify your App title that has a 50-character limit, a short description, and a full description with the character limit of 80 and 4000 respectively. Think of a catchy app title that is somewhere related to your business. Also, don’t forget to use keywords as it will help your app with rankings on the app store searches. Just make sure you don’t overdo them.

Graphic Assets

Here, you can upload screenshots, images, videos, graphics, and icons that provide an overview of your app’s features and functionality. Some are mandatory while some are optional. Before you upload, do go through the dimension requirements for each.

Languages and Translations

You also have the option to translate your app’s information along with adding in-language screenshots and other localized images.

Categorization

This segment requires you to specify the application type and the app category. Pick the one that best describes your mobile app. You will also see the option of content rating but that can be skipped for now as you can provide the content rating only after uploading the app APK.

Contact Details

Under contact details, you need to submit the information that would be helpful for the customers in case they want to reach out to you, such as the support email address, website link, phone number, etc.

Privacy Policy

Here, you need to add the privacy policy that discloses how the app collects, uses, and shares the users’ data. You are required to add a URL linking to your privacy policy in your store listing and within your app. Ensure the link is relevant.

That’s all in the App Store Listing.

5. Upload APK

Now, you need to upload the APK or App Bundle and signed app release into your application. There are various ways to upload and release your APK, but prior to that, you must create an app release. Select the app you created in point 3 and follow the below steps.

On the menu on the left-hand side, navigate to “Release Management” followed by “App releases.” You will now be asked to select the type of release from the following four options- internal test, close test, production release, and an open test. The first three releases allow you to test your app among a selected group of users before you set it live for everyone to access whereas the production release makes your app accessible to everyone in the countries you selected to distribute it. The former is the safer option as you can optimize your app and fix bugs or errors, if any, before rolling it out to all the users.

Select one and then click on “Create Release” following which you will be redirected to the New release to the production page. Here, you will have to make a decision regarding whether to opt for Google Play app signing or not. If you don’t want to opt, simply click on the “OPT-OUT” option. Now, click on “Browse files” and follow the on-instructions to add your APK files, name and describe your release. Once done, click on “Save.”

6. Content Rating

The next crucial step of the process of publishing your Android app on the Google Play Store is to define the rating of your app. If you do not rate your app, it will be listed as “Unrated” and such apps have higher chances of being removed from the store.

To rate your app, navigate to “Content Rating” on the left-hand side of the menu, click on “Continue” followed by typing your email address. Click on “Confirm”.

Now, you would be required to fill a content rating questionnaire for your app. Make sure that you provide relevant and apt information, any misrepresentation may lead to the suspension or removal of your app from the store. Once done, click on “Save Questionnaire” and select the “Calculate Rating” option to check your app rating. Lastly, click on “Apply”.

7. App Pricing and Distribution

Moving on, now you have to assign the price for your app. You can set the app as free or paid. One important point to mention here is that if you set the app as free, you can’t convert it to a paid one later as Google doesn’t allow that.

Head over to the “Pricing and Distribution” tab and then select whether the app is free or paid.

The next thing you need to do is select the countries where you want to distribute your app. As Google doesn’t support publishing an app for all regions, you will have to specify the countries where the app would be available for the users to download. If the app is meant for children under the age of 13, select “Yes” for Primary-Child Detected else select “No”. You can also choose the option of allowing ads into your application. Moreover, you can distribute your app to specific Android devices and programs too.

8. Publish Your App

You are now just one final step away from publishing your Android app to Google Play Store, which is about reviewing and rolling out your release once you are confirmed that everything has been put up correctly.

Head back to the “Release Management” tab, followed by “App releases”. Then select “Manage Production” followed by “Edit Release”. To review it, click on “Review” and you will be taken to the “Review and Rollout” screen. Here, you can check if you have missed any warnings or issues. Moving ahead, select the “Start rollout to production” option and then finally click on the “Confirm Rollout” option.

Congratulations! You have successfully published your app to Google Play Store. Now just wait for the app to get approved which might take some hours to a few days. But the job doesn’t here. In order to capture mobile app downloads and ensure that your app gets global exposure, promote it through various means. Promote it on social media, submit press releases; do whatever it takes to get your app noticed by your target audience.

That’s all in our guide on how to submit an Android app to Google Play Store. Want to create an Android app for your business? Get in touch with us. Dew Solutions is a proficient app development company.


android appandroid app developmentapp developmentApp submissionGoogle Play Store

Related Articles


Development
iOS App Development Trends For 2022
How To Guides
How to Develop a Minimum Viable Product That Raises Money for Your Mobile App?
Technology
What makes On-demand Apps so popular among Consumers?
A comprehensive guide to User Story Mapping
Previous Article
The Ultimate Guide to Regression Testing
Next Article

Empowering your digital dreams through our cutting edge solutions - Connect with us now!

Get in Touch
Discover Dew
About
Careers
Partnerships
Success Stories
Our Expertise
Centre of Excellence
Technologies
Industries
Services
Resources
Blog
Guides
Covid Response
Privacy Policy
Inquiries
info@dewsolutions.in
Careers
careers@dewsolutions.in
Gurugram, India (HQ)

P301, 3rd Floor, JMD Megapolis,
Sector-48, Gurugram – 122018
+91 (124) 421-2275

Pune, India

WeWork, Magarpatta Futura,
Magarpatta Rd, Kirtane Baugh,
Pune, Maharashtra – 411028

USA

16192, Coastal Highway, Lewes,
Delaware, 19958
+1 (302) 208-6888

Partners
Facebook-f Linkedin-in Behance
Copyright © 2010-2024 Dew Solutions Pvt Ltd. All Rights Reserved